Creating Tooltips for Images with CSS
Introduction
Cascading Style Sheets (CSS) are used in Web development to format Web page text, layout Web pages, and enhance hyperlinks. Cascading Style Sheets can also be used to create more dynamic effects such as tooltips, the pop-up text messages that appear when an HTML element is moused over.
Tooltips can be created with the HTML title attribute, but the resulting tooltip stays visible for only a few seconds and it can't be formatted. Tooltips can also be created using JavaScript and CSS, but this requires advanced knowledge of JavaScript. In this article I demonstrate how to use CSS to create tooltips that appear when a Web page image is moused over.
The Technique
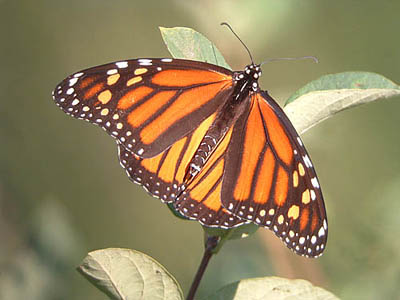
Move your mouse over the image below. The box that pops up was created using only Cascading Style Sheets.
The HTML code used to create this effect looks like this:
<div class="photo-container">
<a href="#">
<img src="monarch.jpg" alt="Monarch" />
<span>This is a Monarch butterfly. Monarchs belong to the family <i>Daniidae</i>, the so-called milkweed butterflies. Like other members of the <i>Daniidae</i>, Monarch caterpillars feed almost exclusively on plants in the milkweed family, hence the name milkweed butterflies.
</span>
</a>
</div>
</html>
In the above HTML code the image is nested within a <div> tag and an <a> tag. Since we're using the <a> tag only for this effect and not a working hyperlink, the href attribute is set to the dummy value "#". The <a> tag itself is critically important for reasons explained below. Note also that the <span> tag is nested within the <div> and <a> tags. The text within the <span> tag is the text that will appear in the actual tooltip.
The CSS code used to create this effect looks like this:
div.photo-container {
max-width: 25em;
height: auto;
position: relative;
margin: 1.563em auto;
}
div.photo-container a {
text-decoration: none;
color: black;
cursor: default;
font-weight: normal;
}
div.photo-container a span {
visibility: hidden;
position: absolute;
left: 15em;
top: -2.3em;
background: #ffff6b;
width: 17em;
border: 1px solid #404040;
font-size: 0.8em;
padding: 0.3em;
cursor: default;
line-height: 1.4;
}
div.photo-container a:hover span {
visibility: visible;
}
</style>
In the above CSS code block there are 5 classes. The first class, div.photo-container, sets the definitions for the containing <div> element. The second class, div.photo-container a, sets the definitions for the <a> element contained in the <div> element. Note that the text-decoration property has been set to none in this class. This is because we don't want a blue border to appear around the image or the text itself to be underlined in blue. Moving on, the third class is div.photo-container a span and this sets the definitions for the <span> element. As mentioned above, the <span> element contains the text that appears in the tooltip. The important properties and values for this element are visibility: hidden, which keeps the element hidden, and position: absolute, which positions the element. The div.photo-container a:hover span class is the meat of the code for this effect. Note that the visibility property is set to visible - when the mouse moves over the image the code in this class kicks in and makes the otherwise hidden span visible, creating the tooltip. In this respect a:hover functions somewhat like a mouseover event in JavaScript. As long as the mouse remains over the image the tooltip will remain visible. The fifth and final class, div.photo-container img sets the dimensions of the image.
Problems
Since this effect depends on wrapping an image element in an <a> tag, an HTML hyperlink will be created. If a user clicks on the image the page will jump to the top of the browser screen. Nothing can be done to prevent this, but CSS can be used to remove most of the cues that might lead a user to click the image in the first place. In the sample CSS code block above, note that the text-decoration property has been set to none, the color property has been set to black, and the cursor property has been set to default. This code removes most of the conventional cues that would identify the image as a hyperlink to a user. The one cue that the CSS code doesn't remove (and can't remove) is the URL that appears in the browser's status bar. Accessing and manipulating the browser's status bar is fairly easy using JavaScript however, and a snippet of JavaScript code can be added that hides the URL in the status bar when the image is moused over.
The other issue is browser compatability. I've tested this code on Opera 9.64, Firefox 3.5.2, and Internet Explorer 8 on a PC, and Safari 1.3.2 and Opera 9.64 on a Mac and it works fine. In theory any browser that understands Cascading Style Sheets, Level 2.1 should be able to render this code correctly but there could be exceptions.
Other Web Development Articles By Robert D. Hughes

